Building a Javascript JWT auth system using TDD (part 1)
Last updated
Antonio Ufano
Every time I want to learn a new programming language or framework I try do a couple of basic apps, like a to-do list and then move to something I can reuse in future projects, like a user registration and authentication system. In this article I'll explain how to create an authentication system in Javascript with an API (built with Express) that uses Json Web Tokens (JWT). In addition, I'll be following a Test Driven Develoment approach using Mocha as a test framework and Chai as the assertion library.
TDD has a lot of benefits when creating a new project as it help us identify errors faster (fail fast), which will help us with continuous integration/delivery and, in addition, the tests will serve as documentation of the application. You can read more about the benefits of TDD in the following article.
The basic steps to follow when using TDD are:
- Requirement is translated to a test
- Run and fail the test
- Write the code
- Run and pass the test
- Refactor the code / pass test again
- Repeat
You can find all the code of this article (tests included) in the following repository in GitLab.
Let's go!
You can find the second part of this series here
Setting up the project
As usual, I started a node application with $npm init which creates the package.json for the app. Find below a list of all the modules our app will require:
-
express: framework for our app
-
body-parser: middleware to handle incoming requests as JSON.
-
mocha: test framework.
-
chai: assertion library for mocha.
-
chai-http: to send requests to our API from our tests.
-
jsonwebtoken: to generate the JWT.
-
morgan: to debug (optional)
-
nodemon: to auto restart server automatically when files change (optional)
You can install them all them using $npm install module_name
As we'll follow a TDD approach, first thing to do is to make sure our test framework (mocha) is working as expected. As detailed in the official documentation, let's create a 'test' folder with a file named test.js inside which will contain a simple test like this:
var assert = require('assert')
describe('Array', function () {
  describe('#indexOf()', function () {
    it('should return -1 when the value is not present', function () {
      assert.equal([1, 2, 3].indexOf(4), -1)
    })
  })
})
Configure the test script in the package.json to launch mocha.
/**
 * package.json
 * node app properties
 */

"scripts": {
    "test": "mocha",
    "start": "nodemon server.js"
},
Note: You can configure the test script to target a specific folder, recursive ones or specific file types (like spec.js) by passing mocha different parameters. You can find more info in this section of the docs.
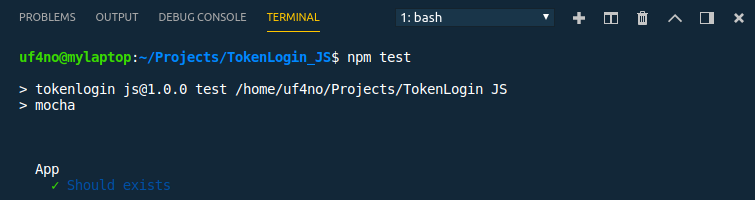
Once we have the test and mocha configured, we just have to run $npm test and we'll get the following output:

We're ready to roll 🤘
Creating the express app
The base of this small project is going to be an express based API that handles requests to store new users (/register), authenticate them (/login) and return valid tokens (JWT) that are used to access protected routes of the app. Our API will have the following endpoints:
- GET / - Returns a simple message. Public.
- POST /register - Stores new users in the database
- POST /login - Validates user/pass and return a token
- GET /protected - Requires a valid token, returns user info.
Following a TDD approach, let's create our first test which will just verify that our app exists:
/**
 * test/test.js
 * Basic tests for Auth system API
 */
const chai = require('chai')
const expect = chai.expect

//start app
const app = require('../app')

describe('App', () => {
  it('Should exists', () => {
    expect(app).to.be.a('function')
  })
})
Notice that I'm using the expect assertions from the chai module. In mocha, describe() is used to group tests, for example, from the same functionality or resource/domain and each test is defined with the it() function, which receives a description and a function that contains all the assertions. If we run the test above we'll get a very descriptive error "Error: Cannot find module '../app'". So to fix that, let's go ahead and create a file named "app.js" in the root of our project. This file should export our express app which can be easily created with the following code:
/**
 * api/app.js
 * exports an express app.
 */

const express = require('express')
//initializes express app
const app = express()

module.exports = app
Now our test will pass.
Obviously our app is not doing anything so lets add more tests. We need our app to be listening for requests in all the endpoints defined previously so let's start with the easiest one, GET requests in / . In order to test HTTP requests we have to add the chai-http module. Then we can use the chai.request() method to launch the requests. This method is followed by the type of request we want to send (get, post, put, delete..) and it will resolve/reject a promise when it receives a response so we can use .then()/.catch() to handle the response from our app:
/**
 * test/test.js
 * Basic tests for Auth system API
 */

//import chai-http to send requests to the app
const http = require('chai-http')
chai.use(http)

describe('App basics', () => {
  it('Should exists', () => {
    expect(app).to.be.a('function')
  })

  it('GET / should return 200 and message', (done) => {
    //send request to the app
    chai
      .request(app)
      .get('/')
      .then((res) => {
        //assertions
        //console.log(res.body);
        expect(res).to.have.status(200)
        expect(res.body.message).to.contain('Yabadabadooo')
        done()
      })
      .catch((err) => {
        console.log(err.message)
      })
  })
})
Note that as we're adding a param (done) to the arrow function that it() receives as a param. This indicates the test is asynchronous (chai.request() _launch async requests) and will not be completed until we manually indicate it by calling _done() at the end. You can find more info about asnyc tests with mocha in this section of the docs. If we run this test, it will fail.
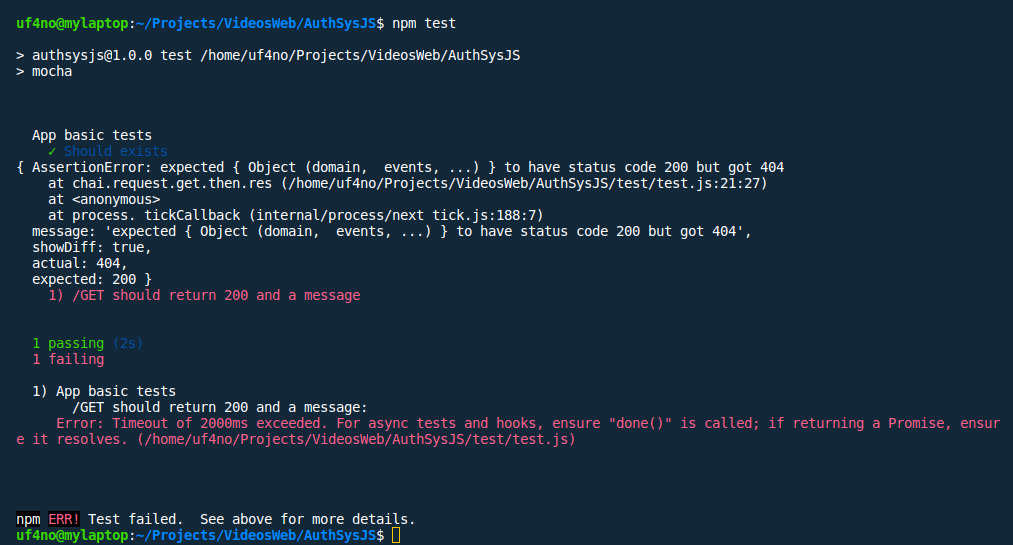
That's because our app is running but not listening for incoming requests in any endpoint as we've not defined any route yet, so it returns an error. In order to fix this we just have to add the body-parser middleware and define the endpoint route in our express app. It will look like this:
/**
 * api/app.js
 * exports an express app started.
 */

const express = require('express')
const app = express()

const bodyParser = require('body-parser')

//middleware to parse requests of extended urlencoded
app.use(bodyParser.urlencoded({ extended: false }))
//middleware to parse requests of content-type - application/json
app.use(bodyParser.json())

//endpoints
app.get('/', (req, res) => {
  res.send('Yabadabadooo')
})

module.exports = app
Now our test should pass :) We've coded the first endpoint following TDD. First we create the test, failed it and add code until the test pass.
With one of the endpoints completed, let's create the rest.
Registering new users
As previously, first thing to do is to create a test. The target endpoint to register new users will be POST /register and it will receive the user details (name, email and password). Our app will validate then user details and once done it will return a 201 status code and a message "User created". The test for this functionality be like this:
    /**
 * test/test.js
 * Basic tests for Auth system API
 */

...........

describe('User registration', () => {

    it('Should return 201 and confirmation for valid input', (done) => {
        //mock valid user input
        const new_user = {
            "name"  : "John Wick",
            "email": "john@wick.com",
            "password": "secret"
        }
        //send request to the app
        chai.request(app).post('/register')
            .send(new_user)
                .then((res) => {
                    //console.log(res.body);
                    //assertions
                    expect(res).to.have.status(201);
                    expect(res.body.message).to.be.equal("User created!");
                    expect(res.body.errors.length).to.be.equal(0);
                    done();
                }).catch(err => {
                    console.log(err.message);
                })
    });

})
I've created a new describe() block to group different tests for this endpoint. First thing we do is to mock the user input in an object that contains the user's name, email and password. Then we send this information to our app using chai.request() and use the send() method to attach the user input to the request. Once the request is resolved (.then()) we validate that the body of the response (res.body) has the correct status code and message.
If we run this test we'll get a 404 error similar to the one we got when got previously as we have not defined the /register endpoint yet. Instead of adding it directly in our app.js file, let's create a routes.js file and include the following code in it:
/**
 * /api/routes.js
 * exports an express router.
 */

const express = require('express')
//create the express router that will have all endpoints
const router = express.Router()

router.post('/register', (req, res, next) => {
  let hasErrors = false
  let errors = []

  if (!req.body.name) {
    //validate name presence in the request
    errors.push({ name: 'Name not received' })
    hasErrors = true
  }
  if (!req.body.email) {
    //validate email presence in the request
    errors.push({ email: 'Email not received' })
    hasErrors = true
  }
  if (!req.body.password) {
    //validate password presence in the request
    errors.push({ password: 'Password not received' })
    hasErrors = true
  }

  if (hasErrors) {
    //if there is any missing field
    res.status(422).json({
      message: 'Invalid input',
      errors: errors,
    })
  } else {
    res.status(201).json({
      message: 'User created!',
      errors: errors,
    })
  }
})

module.exports = router
As you can see, the endpoint receives 3 parameters, req (requests), res (response) and next (next action). The request will contain the data sent by the users, in our case a json with the name, email and password, and the response is what the application will send back, in our case a message ('User created' / 'Invalid input') and an array of errors. The first thing we do is validate if the body of the request contains each expected field and, if not, change the flag hasErrors to true and add the error to the errors array. Finally we modify the response status depending on the validations we've done and include the message and errors as a JSON object.
If we run the tests again it will still fail. That's because we've defined the new endpoint in the routes.js file but we've not imported it in our express app (app.js file). We can import it with require and attach as a middleware to our app with the use() method.
/**
 * api/app.js
 * exports an express app started.
 */
............
//import router with endpoints definitions
const routes = require('./api/routes');
//attach router as a middleware
app.use(routes);
Now our test should pass.
Although test passes, our application is not doing too much, just returning a message and a JSON object but that's enough to demonstrate this example. Ideally I'd add more tests to validate that we're not allowing a user to register with an email that is already in the database, the email and name formats or that the password should contain numbers and letters.
I'll explain how to encrypt the password using bcrypt and how to save the user in a Mongo database in a continuation article. For now, let's move on to the login endpoint.
Login users
As with the previous endpoints, the first thing to do is to create a test. In this scenario we'll send a POST request to /login and we expect to receive a successful status code (200), a message "Auth OK" and a JWT token which will be used to access protected routes. Our test will be like this:
/**
 * test/test.js
 * Basic tests for Auth system API
 */
    ...........

    describe('User login', () => {
        it('should return 200 and token for valid credentials', (done) => {
            //mock invalid user input
            const valid_input = {
                "email": "john@wick.com",
                "password": "secret"
            }
            //send request to the app
            chai.request(app).post('/login')
                .send(valid_input)
                    .then((res) => {
                        //console.log(res.body);
                        //assertions
                        expect(res).to.have.status(200);
                        expect(res.body.token).to.exist;
                        expect(res.body.message).to.be.equal("Auth OK");
                        expect(res.body.errors.length).to.be.equal(0);
                        done();
                    }).catch(err => {
                        console.log(err.message);
                    })
        });
    });
We run our test suite again and it will fail as our app will return a 404 status code as we've not defined the /login endpoint. Let's work on that. We can add the endpoint with just a few lines:
/**
 * /api/routes.js
 * exports an express router.
 */

..............

router.post('/login', (req, res, next) => {
    res.status(200);
});
If we run the tests again, we'll pass the status assertion but it will still fail because we're not returning the token nor the message. In order to generate the JWT token we first need to verify that we've received the user and password in the body of the request (req.body), then verify that they are valid and finally we'll generate the token. As we've not prepared our code to store the registered users in a database yet, we'll just check if the email and pass are "john@wick.com" and "secret" for now. If the email and password do not match we'll return a status code 401 with the message 'Auth error'. Our login route will look like this:
/**
 * /api/routes.js
 * exports an express router.
 */

..............

router.post('/login', (req, res, next) => {
    let hasErrors = false ;
    let errors = [];

    //validate presence of email and password
    if(!req.body.email){
        errors.push({'email': 'Email not received'})
        hasErrors = true;
    }
    if(!req.body.password){
        errors.push({'password': 'Password not received'})
        hasErrors = true;
    }

    if(hasErrors){
    //return error code an info
        res.status(422).json({
            message: "Invalid input",
            errors: errors
        });

    }else{
    //check if credentials are valid
        if(req.body.email == 'john@wick.com' && req.body.password == 'secret'){
            //return 200 and message OK
            res.status(200).json({
                message: 'Auth OK',
                errors: errors

            });
        }else{
            //return 401 and message KO
            res.status(401).json({
                message: "Auth error"
            })
        }
    }
The only thing preventing our test to pass all assertions is to return a token. If you're not familiar with JWT tokens you can get some info in jwt.io .
To generate the JWT tokens we'll have to install and import the jsonwebtoken module. As detailed in its documentation, we can use the jwt.sign() method to generate the tokens. This method receives 3 parameters: the payload (info to be stored in our token), a key to encode it and an object with options (like expiration time). The most important one is the key. As it will be used to encode our tokens, we have to store it in a secure location, like an environment variable which can be accessed from our code with process.env.VARIABLE_NAME. In our case let's just name our variable JWTKEY and load it directly at the beginning of our _app.js file with any value we want:
/**
 * api/app.js
 * exports an express app started.
 */
...............
process.env.JWT_KEY = "thisIsMyJwtKeyUsedToEncodeTheTokens";
...............
Now back to our routes.js file, once we've validated the email and password from the request.body we'll generate the token so we can include it in our response:
/**
 * /api/routes.js
 * exports an express router.
 */

//..............

router.post('/login', (req, res, next) => {
  let hasErrors = false
  let errors = []

  //validate presence of email and password
  if (!req.body.email) {
    errors.push({ email: 'Email not received' })
    hasErrors = true
  }
  if (!req.body.password) {
    errors.push({ password: 'Password not received' })
    hasErrors = true
  }

  if (hasErrors) {
    //return error code an info
    res.status(422).json({
      message: 'Invalid input',
      errors: errors,
    })
  } else {
    //check if credentials are valid
    if (req.body.email == 'john@wick.com' && req.body.password == 'secret') {
      //generate JWT token. jwt.sing() receives payload, key and opts.
      const token = jwt.sign(
        {
          email: req.body.email,
        },
        process.env.JWT_KEY,
        {
          expiresIn: '1h',
        }
      )
      //validation OK
      res.status(200).json({
        message: 'Auth OK',
        token: token,
        errors: errors,
      })
    } else {
      //return 401 and message KO
      res.status(401).json({
        message: 'Auth error',
      })
    }
  }
})
Now all our assertions should pass. We're sending back the status code 200, the message 'Auth OK', the JWT token and an empty errors array.
Conclusion
Although it still have a lot of things to polish, we've built a basic registration and authentication system using TDD. In the next article I'll include integration with a Mongo database and I'll use the bcrypt module to encrypt the user password before storing it in the database. Once we save the registered users in the database we'll be able to properly validate the credentials in the login method.
The entire code can be found in GitLab.
I hope this article helps you understand the benefits of TDD. Creating tests before writing a single line of code will help us whenever we have to add new features to our application as if there is any incompatibility with previous functionalities, our tests will fail. This will also be helpful when setting up continuous integration / continuous delivery pipelines. In addition, having a good set of tests will also help other developers understand what the application does without even looking at the code.
See you in the next one.
Happy codding!
If you enjoyed this article consider sharing it on social media or buying me a coffee ✌️
Oh! and don't forget to follow me on Twitter where I share tons of dev tips 🤙
Other articles that might help you
my projects
Apart from writing articles in this blog, I spent most of my time working on my personal projects.
theLIFEBOARD.app
theLIFEBOARD is a weekly planner that helps people achieve their goals, create new habits and avoid burnout. It encourages you to plan and review each week so you can easily identify ways to improve your productivity while keeping track of your progress.
Sign upSolidityTips.com
I'm very interested in blockchain, smart contracts and all the possiblilities chains like Ethereum can bring to the web. SolidityTips is a blog in which I share everything I learn about Solidity and Web3 development.
Check it out if you want to learn SolidityQuicktalks.io
Quicktalks is a place where indie hackers, makers, creators and entrepreneurs share their knowledge, ideas, lessons learned, failures and tactics they use to build successfull online products and businesses. It'll contain recorded short interviews with indie makers.
Message me to be part of it