Deploy Strapi applications to production
Last updated
Antonio Ufano
I've noticed that a lot of people ask me on Twitter or via email a lot of questions about how to deploy Strapi to production so I've decided to write an article about it.
For this article, I've created a basic Strapi project that exposes an API to manage books and authors and connects to a Mongo database. It's a very simple project but will be enough to show you how to deploy your own projects. You can download or clone it from this repo.
In this article I will not explain what Strapi is or how to use it to create an API, so if you're not familiar with Strapi, check my previous article to learn more about it.
We'll deploy this project to DigitalOcean App Platform. I've chosen it for a few reasons:
- It's very easy to use
- You can connect with GitHub and set up automatic deployments (CI/CD)
- It's very cheap (starts at $5/month)
- Provides an SSL certificate, no installation needed
- No need to manage your server, install dependencies, etc...
- Easy to monitor and scale
If you don't have a DO account yet, you can create your DigitalOcean account here and get $100 in credits

Things to consider before deploying Strapi to production
Before going hands-on with DigitalOcean App Platform, there are a couple of things you have to consider when deploying your Strapi application to any production environment (not only on Digital Ocean) so let's go through them one by one:
Use environment variables
For your database connection details, external services, and basically for anything that will be different between your development and production environment. In the files config/database.js and config/server.js you can see that Strapi is automatically configured to load the database and server details from environment variables (or use the default values you defined when the project was created):
//File: config/database.js

module.exports = ({ env }) => ({
  defaultConnection: 'default',
  connections: {
    default: {
      connector: 'mongoose',
      settings: {
        host: env('DATABASE_HOST', '127.0.0.1'),
        srv: env.bool('DATABASE_SRV', false),
        port: env.int('DATABASE_PORT', 27017),
        database: env('DATABASE_NAME', 'api-books'),
        username: env('DATABASE_USERNAME', null),
        password: env('DATABASE_PASSWORD', null),
      },
      options: {
        authenticationDatabase: env('AUTHENTICATION_DATABASE', 'admin'),
        ssl: env.bool('DATABASE_SSL', false),
      },
    },
  },
})
This means that all you'll need to do in Production is to create those environment variables and the values will be applied. I'll show you how to create environment variables in Digital Ocean App Platform later on.
Note: apart from these, environment variables are especially important for things like email providers, external API keys, and other services so consider using them in all those scenarios.
Create an admin account
Strapi stores the admin account details in the database so when you deploy it to production for the first time, you'll have to create the admin account. I know it's obvious but you should use a stronger password for your production admin account 😉
Once deployed, you'll be able to create the admin account by accessing your project's main path or the route /admin/auth/register-admin.
Configure role permissions
Strapi also stores the role permissions in the database so you'll have to manually configure them. Again, this is very important on your first Production deployment but you will not have to do it in the following deployments unless you need to change them.
You can configure the role permissions in the settings inside the admin dashboard.
Deploy Strapi to Digital Ocean App Platform
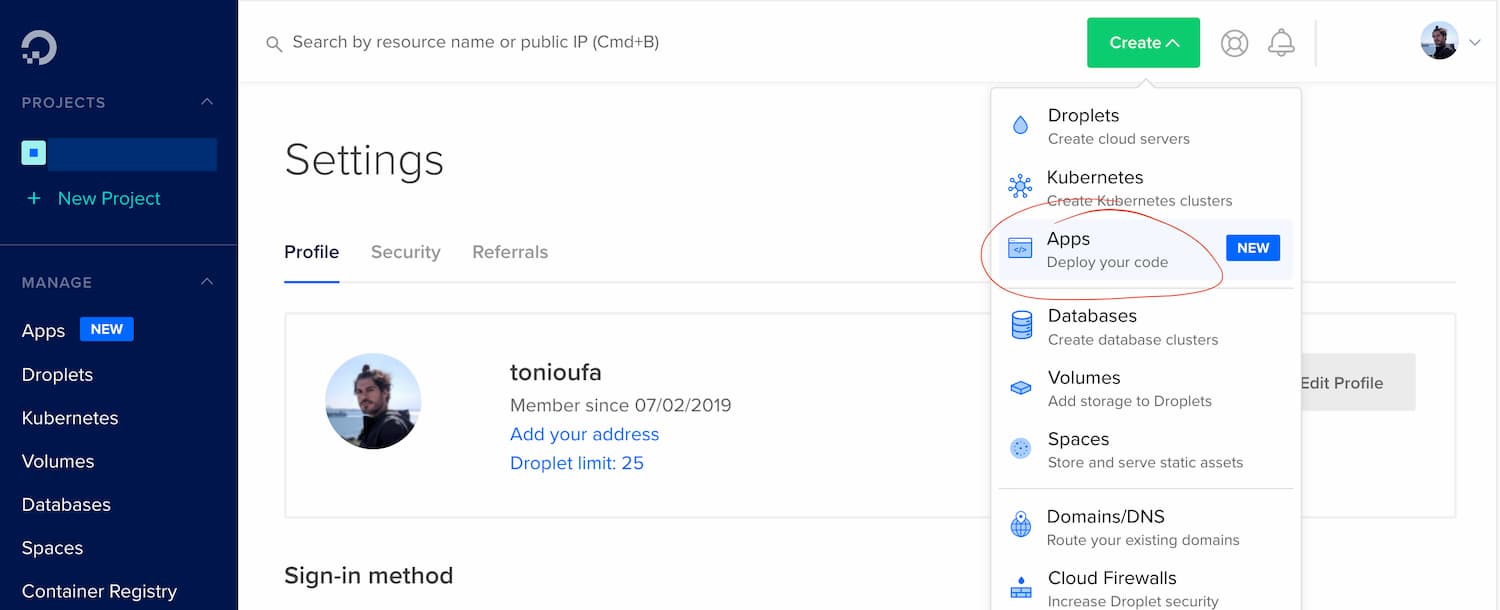
The first thing you need is a Digital Ocean account to if you don't have one, you can create one here and get $100 in credits. Once you're logged in, go to the green "Create" button on top and select the "Apps" option:
It will redirect you to a 4 steps process to deploy your application
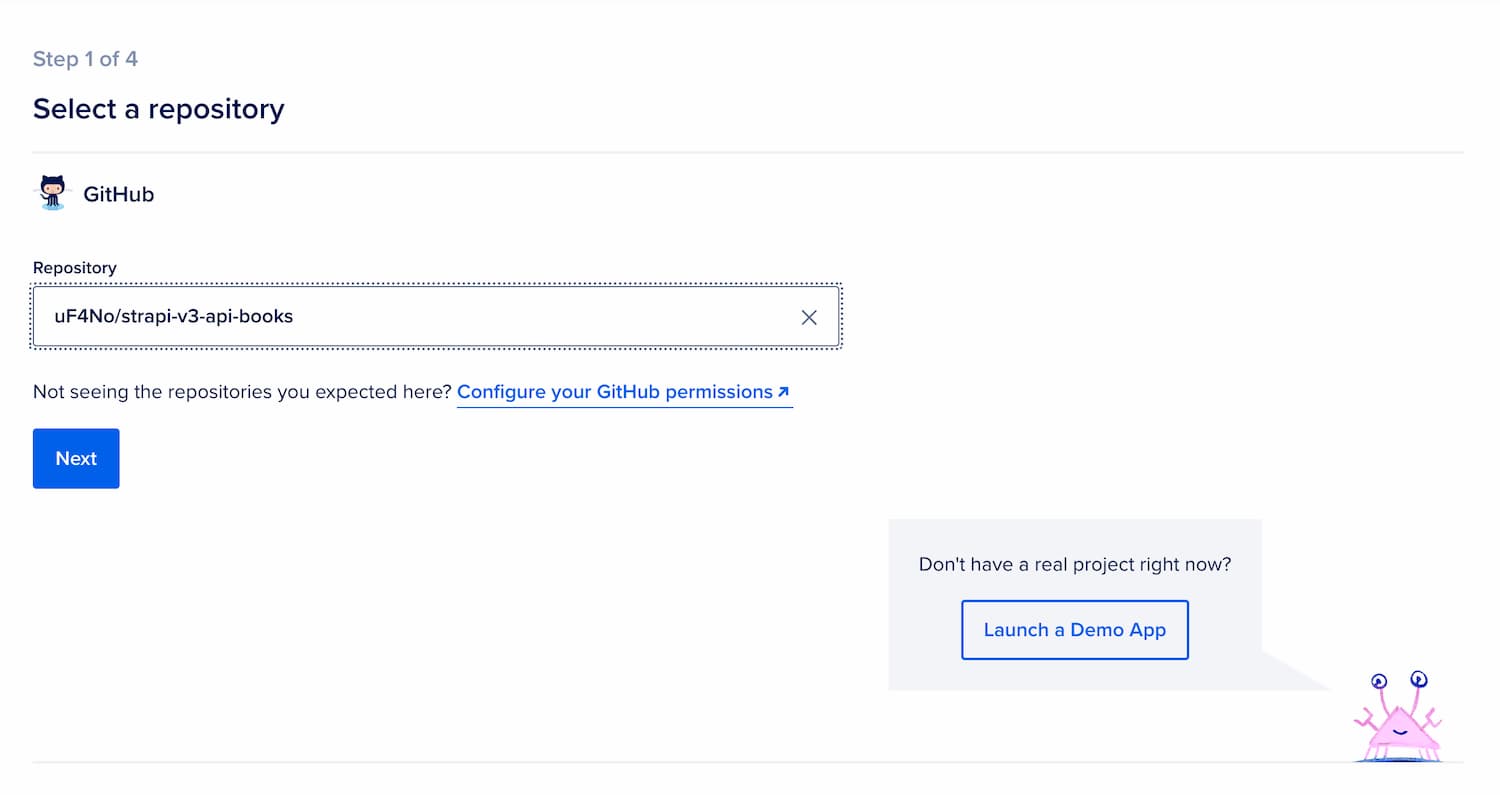
Choose the repository
The first thing to do is to configure your GitHub permissions to allow DigitalOcean to access your repository in GitHub. Click on the link and select your GitHub profile:
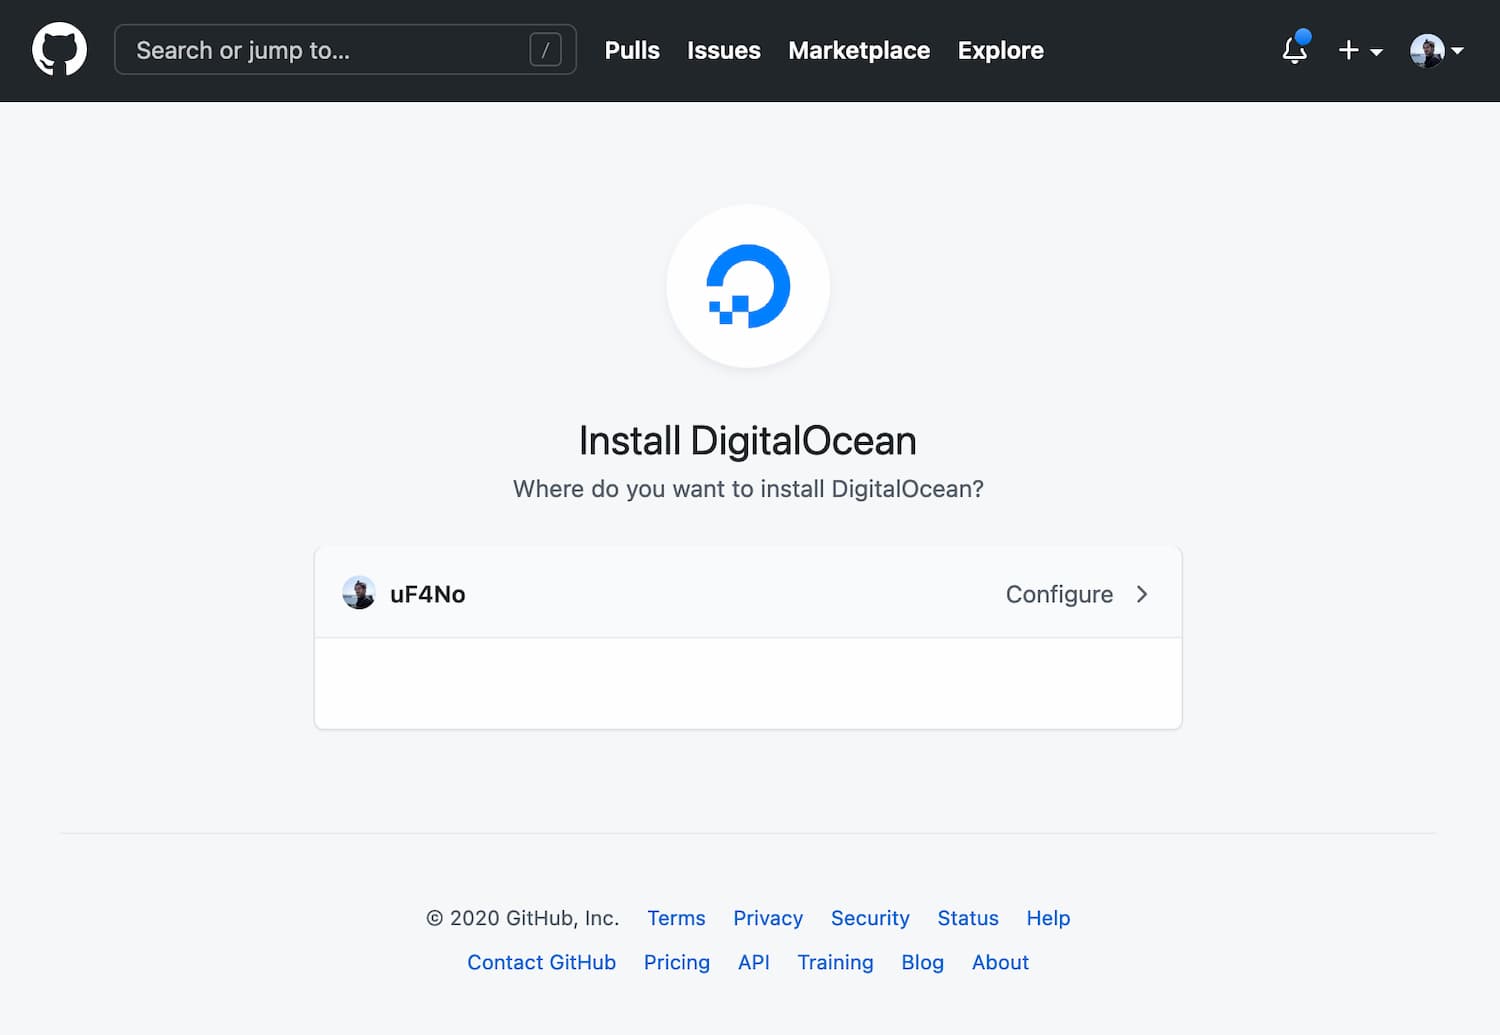
Enter your GitHub password and on the next screen, you'll be able to allow DigitalOcean to access all your repositories or select your app's one.
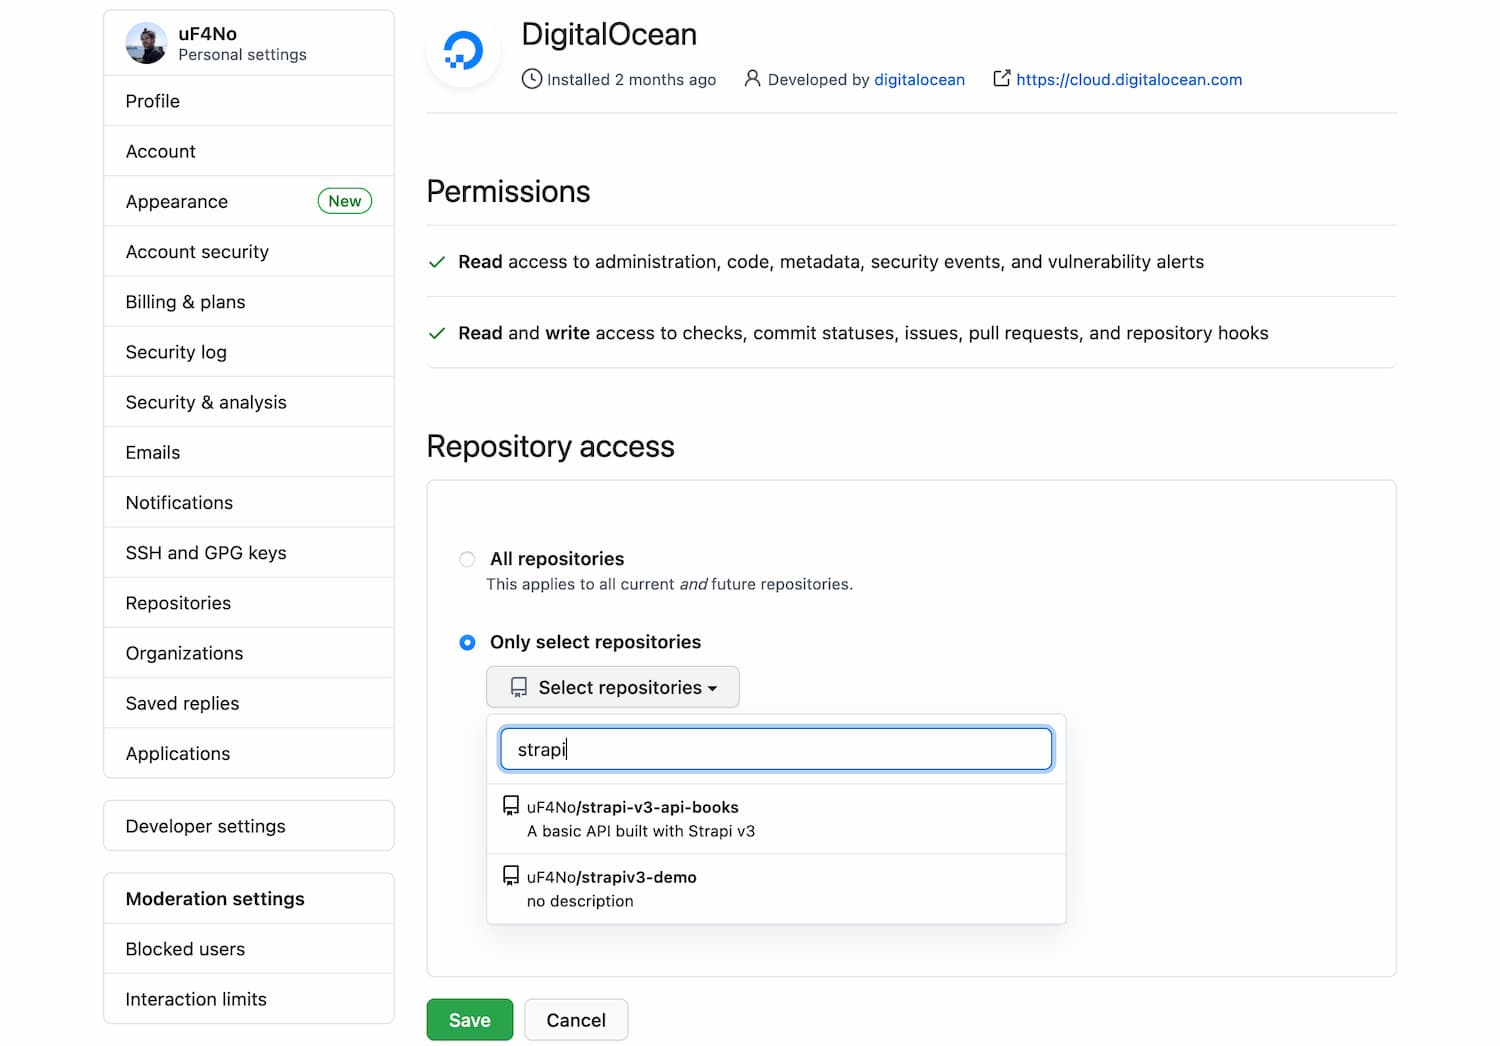
Save your changes and you'll be redirected back to DigitalOcean App Platform. Now you'll be able to select your repository from the dropdown.
Select the region and CD
In the next step, you can select your application name and choose a region. Currently (December 2020), the App Platform runs in New York, Amsterdam, or Frankfurt.
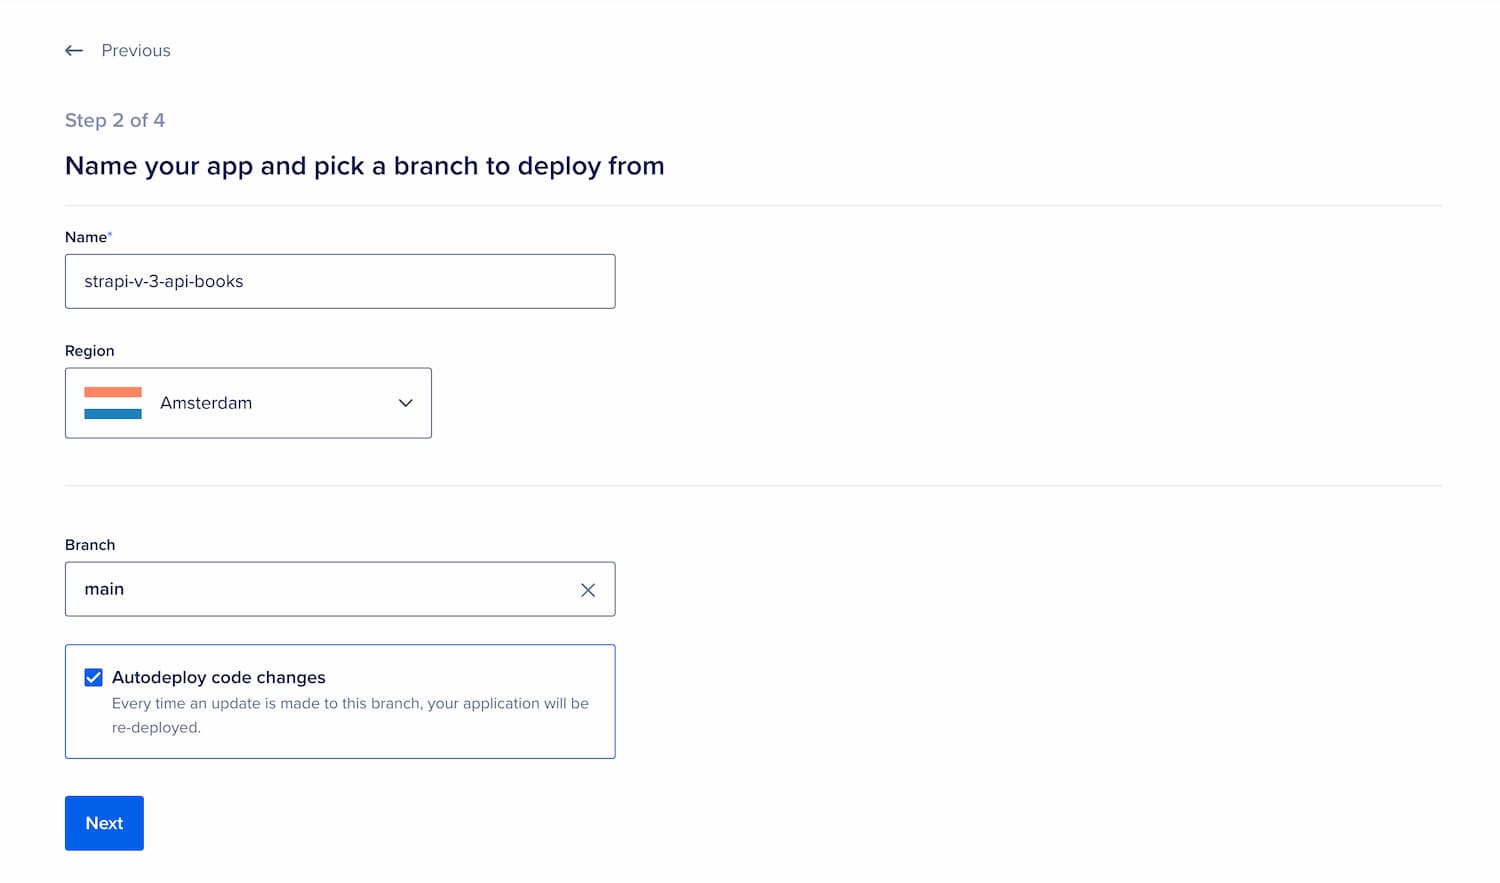
In this step, you can also select the repository branch to deploy and indicate if you want to automatically deploy when changes are merged into the branch.
Configure the App
The App Platform will automatically detect your application as a Node.js Web Service and pre-populate some configurations like the build and run commands, which will match with the ones defined in the application's package.json file.
In this step is where you need to manually add all our application required environment variables as mentioned earlier and even encrypt them:
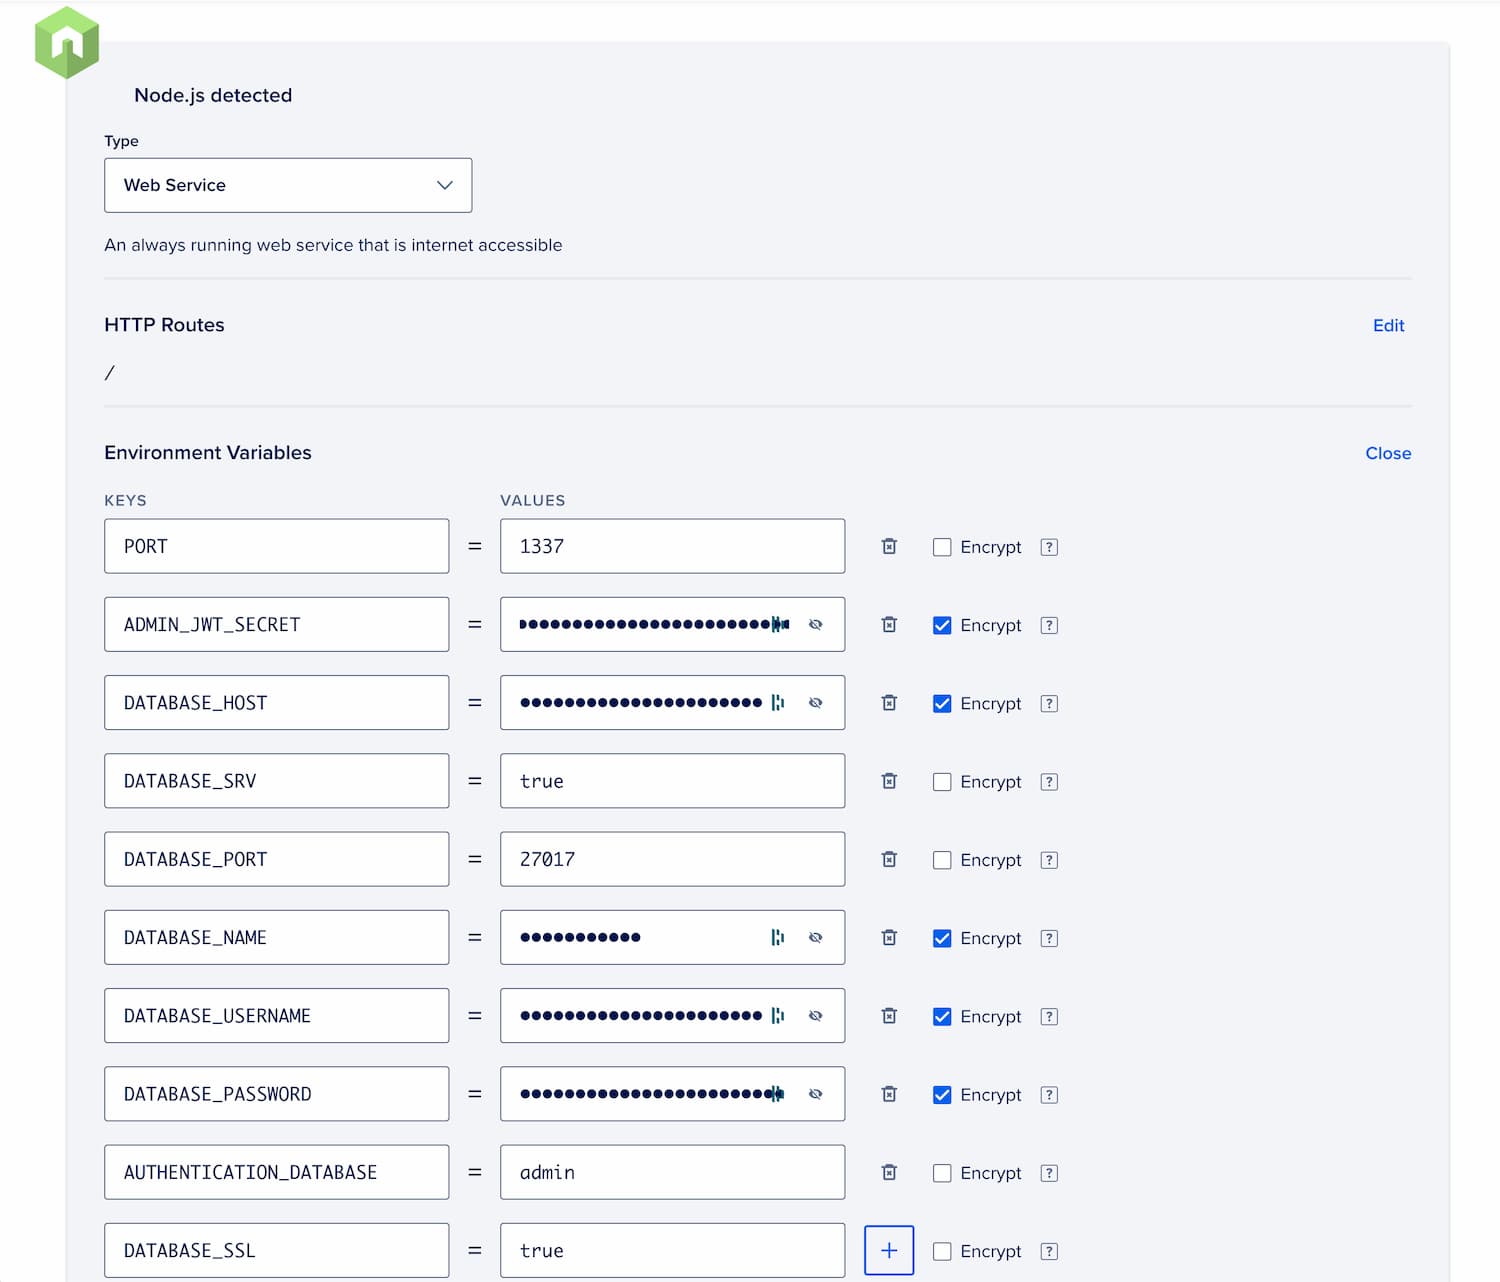
Also, make sure the HTTP Port matches the one with your PORT environment variable or change it to 1337 as it's Strapi's default.
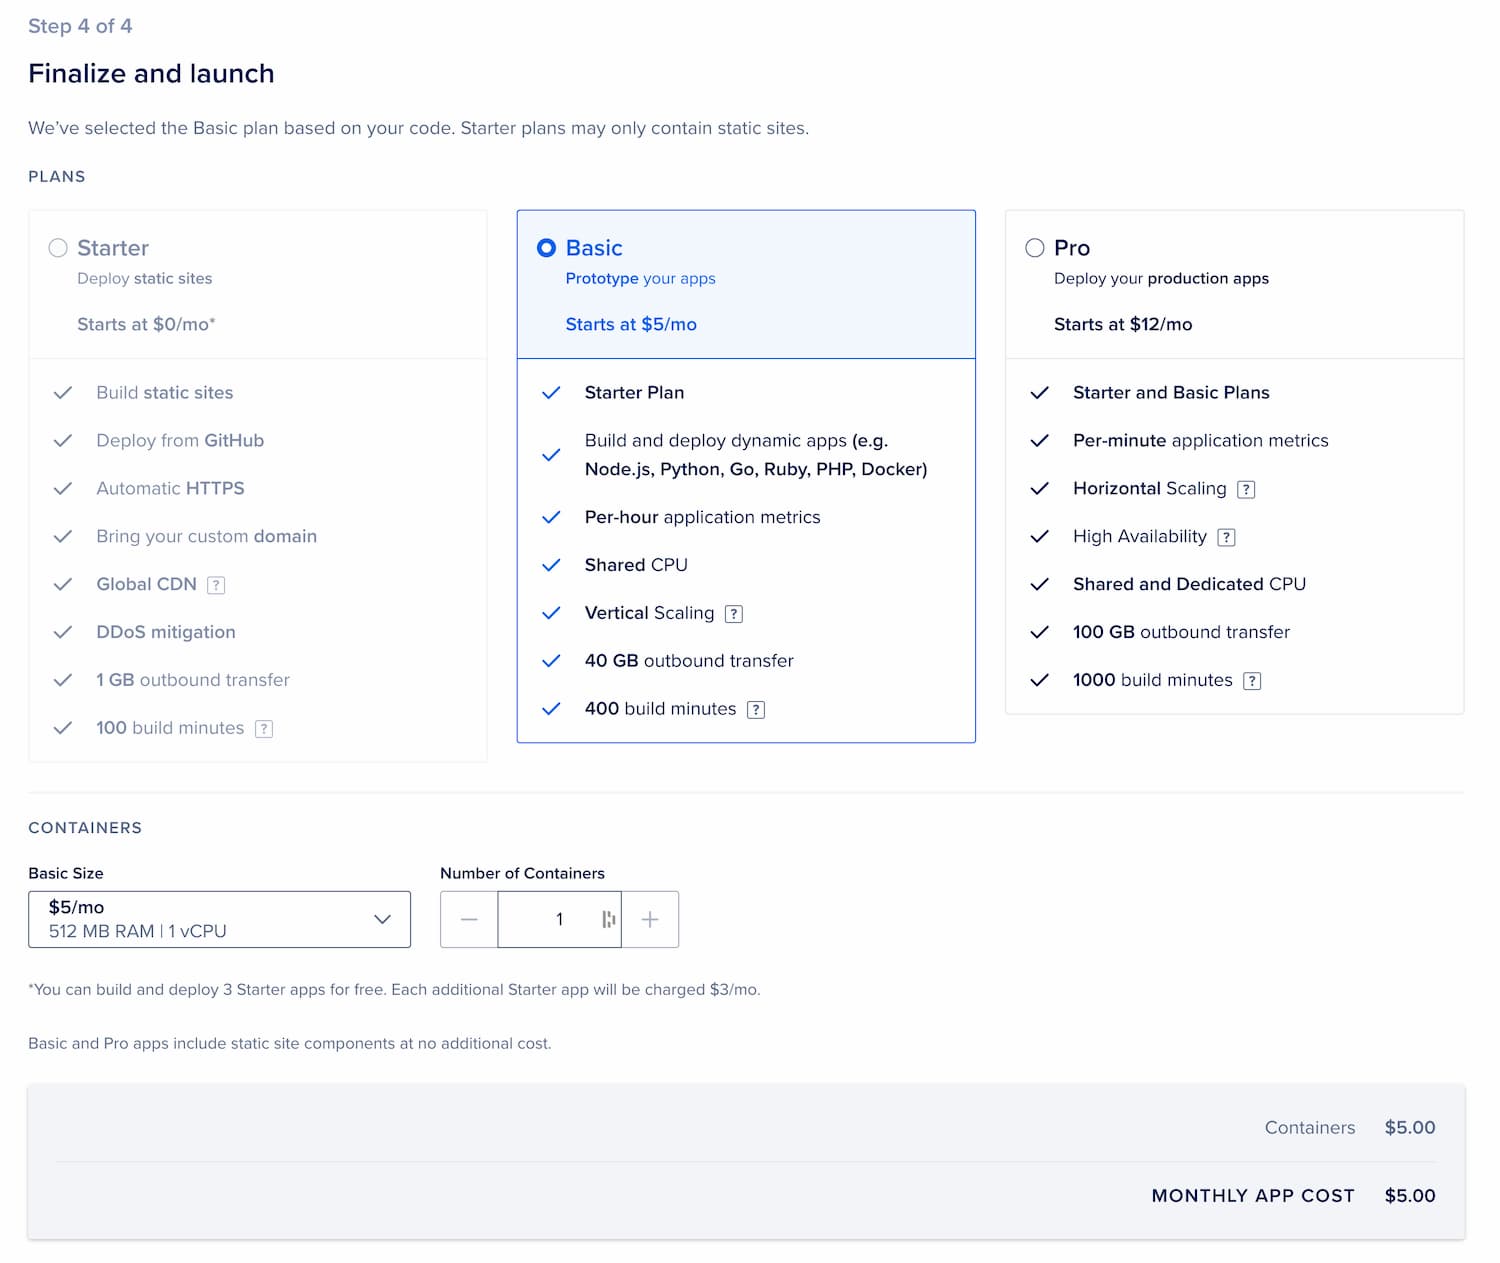
Select a plan
Finally, you'll just need to select a plan and the correspondent container type:
- Basic Plan: offers containers starting on $5/month, which are enough to run a simple Strapi application
- Pro Plan: starts at $12/month
Once selected, click the "Launch App" button at the bottom and your application will start deploying 🚀 Go to the Deployments tab to see the progress and the logs of your deployment.
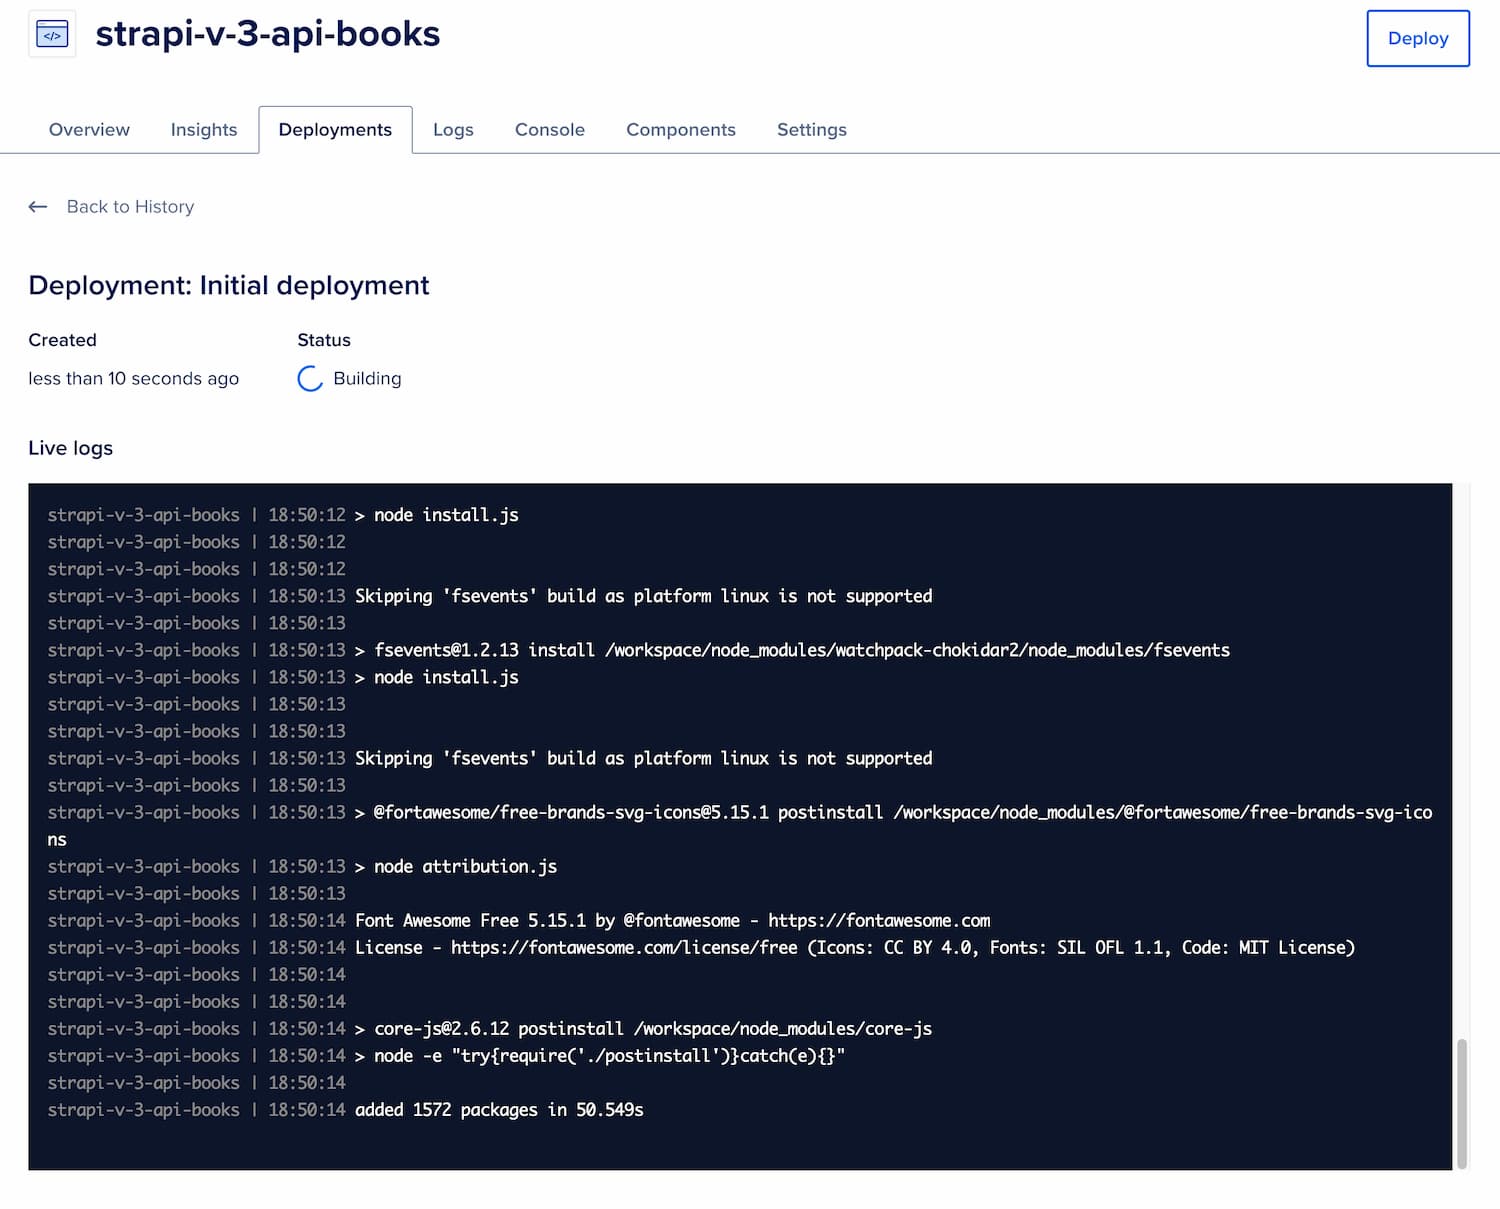
The deployment will take a little bit (around 10mins) as it will have to complete a few tasks: clone your repo, install all the dependencies, build your project, create a Docker image of your project, push that image to a container registry and finally download that image and run it.
Common errors when deploying Strapi to Production
You'll probably face some errors when deploying your application to a new environment for the first time, but you'll find useful logs in the Deployments tab.
Here are some common errors and how to fix them
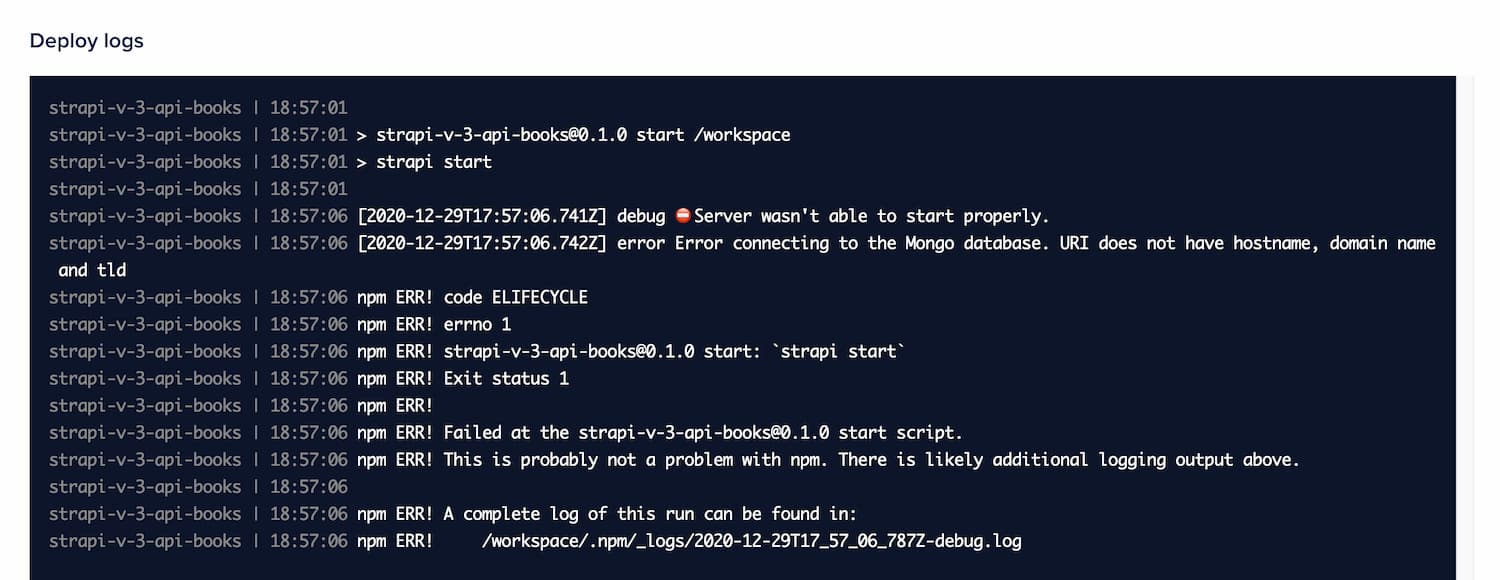
- Database configuration: make sure your environment variables are correct. Check the SSL and SRV options especially. If your application is unable to connect to the database, you'll get an error like this:
- Server configuration: check that the application HTTP port matches the port your application is running on, which by default is 1337 in Strapi although you can override it with an environment variable named PORT
- Custom domains: to configure your own domain to point to DigitalOcean App Platform, you'll have to create the DNS A records in your domain registrar (Namecheap, GoDaddy, Ionos, PorkBun...)
First-time configuration and monitoring
Once your Strapi application is successfully deployed, the App Platform will provide you a domain to access it with this format: https://YOUR-APP-NAME.ondigitalocean.app.
As mentioned earlier, the first time you deploy it you'll have to access and create the admin account. You'll also have to configure the role permissions in the Settings for each Content-Type.
If you configured it, your application will be automatically deployed every time you deploy changes to your repository.
In the "Insights" tab, you'll be able to monitor different aspects of your app, like CPU usage, bandwidth, memory, etc...
Finally, in the "Components" tab you'll be able to amend any environment variable, scripts, ports, change the scaling, and other configurations.
Conclusion
I think that DigitalOcean App Platform is a great place to host your Strapi projects as it allows you to focus on building new features instead of spending a lot of time managing your server, scaling it, or configuring a CI/CD system or SSL certificates.
I hope you find this article useful. If you have any questions, feel free to send me a message or contact me on Twitter and I'll be happy to help.
Happy coding!
If you enjoyed this article consider sharing it on social media or buying me a coffee ✌️
Oh! and don't forget to follow me on Twitter where I share tons of dev tips 🤙
Other articles that might help you
my projects
Apart from writing articles in this blog, I spent most of my time working on my personal projects.
theLIFEBOARD.app
theLIFEBOARD is a weekly planner that helps people achieve their goals, create new habits and avoid burnout. It encourages you to plan and review each week so you can easily identify ways to improve your productivity while keeping track of your progress.
Sign upSolidityTips.com
I'm very interested in blockchain, smart contracts and all the possiblilities chains like Ethereum can bring to the web. SolidityTips is a blog in which I share everything I learn about Solidity and Web3 development.
Check it out if you want to learn SolidityQuicktalks.io
Quicktalks is a place where indie hackers, makers, creators and entrepreneurs share their knowledge, ideas, lessons learned, failures and tactics they use to build successfull online products and businesses. It'll contain recorded short interviews with indie makers.
Message me to be part of it